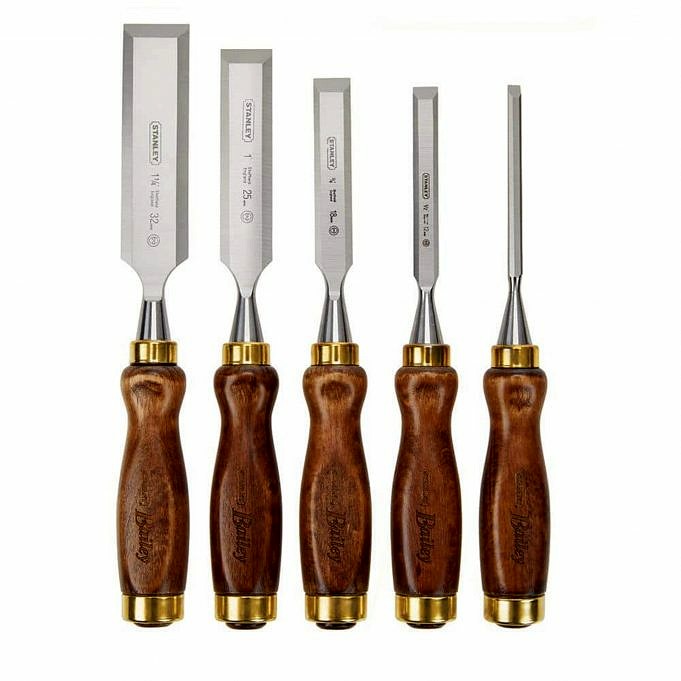
Working on this little block has been an interesting experience, and I hope youll give it a try. Explaining it on the blog has made me think about a lot of basic things that have become habit over the years. The Gottshall block is a hand tool education, and one of the lessons is that what works going with the grain will need to be adapted when going across the grain. It is different to cut across long wood fibers than it is to rip off their edges.
One assumption Im making is that the chisel has a sharp edge and a flat back. The dado is the notch in the drawing. I am able to quickly remove most of the wood waste from the saw by using the chisel. Im not worried about the ends, but I dont want the wood to split past the edge line. I placed the end of my chisel approximately 1/10 cm from the edge of wood, and hit it with a mallet.
This is similar to splitting firewood. The back edge might not run straight up or down. If the grain is running back towards the bottom, I might need to flip it over. After making a few more cuts, I set down the mallet and held the chisel in my two hands. This gives me good leverage with both hands, and my shoulder is directly above the end of the chisel. I can bear down with my body weight to remove a thick slice.
As I get closer to the line, I make a trade-off-more control for less leverage. My right hand moves closer towards the edge of my chisel and I hold it like a pencil. My left hand rests on top of the wood and my bent finger serves as a reference point to ensure the back of the saw is vertical. At this point Im taking off a thin slice to finish up.
So far so good. The notch on the end is similar, but the cut is turned 90 degrees to this one. Splitting is not going to work. It is possible to chop ones way through the grain, but there is a lot of risk of leaving raggedy end grain inside the cut.
I still have saw cuts at the left and right sides, but the amount of wood I can cleanly slice off the end grain is limited. Compare these thin slices with the big hunks I was able to remove in the other direction. I decided to cheat and remove most of the waste using a copingsaw. Well talk about the coping saw soon, as well as additional chisel techniques for working on the curves. I hold the chisel vertically so that it is close to the line, and push down.
In Gottshalls text about making this block, he never mentions other tools beyond the chisel. To finish things such as this, I reach for a router plane, a rasp or float, and a plastic laminate sheet. It’s not easy to achieve perfection with a chisel. Im doing OK, but Im creeping past my layout line on the right, and you can see a bit of light between the square and the wood in the upper right hand corner. I may not get a grade of A on this after all.
The chisel work for the rabbet on the end is similar, but once again the work is rotated 90 degrees. Now, I want to get rid of as much waste as possible by splitting horizontally. The wood can be split easily with a mallet. I can only bring the mallet back a couple of inches because my hip is in the way. Thats OK, because it only takes a tap.
I still have a way to go to reach the line. My left hand is holding down, and my right hand is pushing in. With a lot of control, I can lift a thick slice. Now is a good time for a reminder from the safety police; never, ever hold down the wood with your left hand while pushing the chisel with your right. Clamp the wood down and keep all the parts of both hands behind the sharp edge.
As I get closer to the line, I take finer and more controlled slices. I am working across the grain using the flat back on the chisel to cut out the high spots. I will also slice in from the end if I need to. Vertical cuts are made with the saw. If you look close, you can see that I left some material beyond the pencil line when I made my saw cut. To correct this, I will trim the end grain. I’m pretty proficient with a chisel, but not with the saw.
One of the last cuts left a small piece of wood in the corner of the rabbet’s interior. Lucky for me I was able to find it and glue it back in place. If nothing else goes wrong, I may be able to salvage a B+ on this.
This series of posts began, innocently enough with this.
Then Mike Wenzloff suggested this exercise.
It seemed like a good idea, so I began to lay it out.
I ran out room and had to keep marking knives.
Then I felt a little guilty about not mentioning marking gauges.
Finally, I picked up the saw and started to work.
Recommendations for Product
These are the tools and supplies we use every day in our shop. Although we may be compensated for sales made through our links, these products have been carefully chosen for their utility and quality.


